
Montessori - Practical Life I - Spooning pasta

Quite a few people have asked me lately about teaching a preschooler at home - how do I do it?
I decided to share a series of short posts about the first steps in homeschooling a 3-year-old.
It is a third child of this age that I will be teaching at home and by now I have most of the materials already prepared. This makes a big difference as I don't have to spend much time searching, printing, writing, cutting and laminating many of the materials I need to use, I just take them out of the storage, find a place on a shelf and voila! the material is ready.

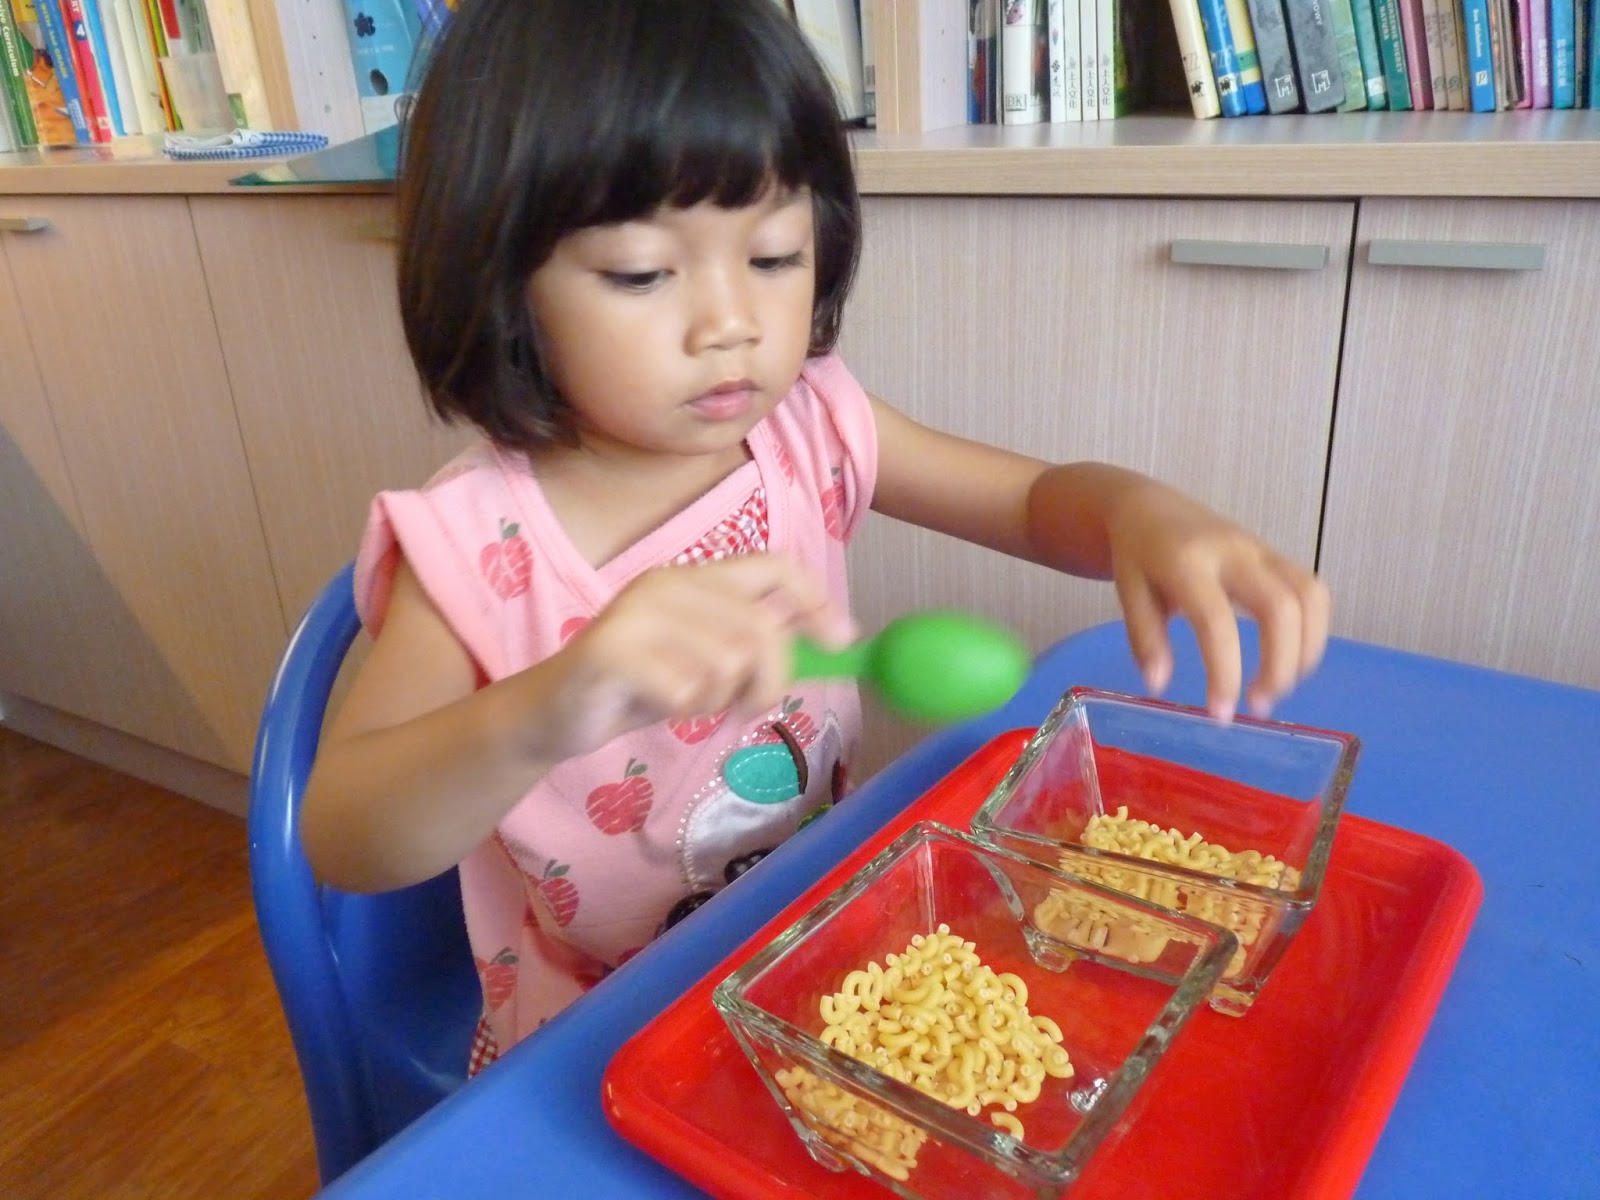
First Practical Life exercise I want to show you is
spooning pasta
.

Materials:
  • tray
  • two identical bowls
  • spoon
  • fine uncooked pasta
The objective of this work is to simply spoon the pasta from one bowl to the other (place the bowl with pasta on the right side for a right handed child and on the left for left handed). It sounds easy, right? Well it usually takes a few tries for the little hands to get it right. You may want to start with larger pasta and a bigger spoon and then change it to smaller pasta - rice - sand/salt.
Remember to tell your child that he is not supposed to eat the 'work'! Ania kept repeating to herself:麵還沒有煮好 - pasta is not cooked.

Carrying the work to the table is not an easy task
(as you will see later).


Tilting the bowl a bit to get all the pasta into the spoon...

... or simply pouring the last bits of pasta from one bowl to the other.

Oh-oh! The tray tipped over and ... all the pasta spilled on the floor.
Now it's time to clean it all up.

Comments

Popular posts from this blog

Fryderyk Chopin - lapbook

Po powrocie na Tajwan zabrałyśmy się ostro za naukę. Pierwszym projektem, który Ania zrobiła był lapbook o Chopinie. Przygotowując się do wykonania lapbooka, Ania wysłuchała wielu utworów Chopina, a także przeczytała (lub wysłuchała) poniższych opowiadań i książek o tym wielkim kompozytorze. Znalazłam też kilka pocztówek kupionych przy okazji wizyt w Żelazowej Woli i w Muzeum Chopina w Warszawie. W końcu do czegoś się te pocztówki przydały. Niektóre części do lapbooka znalazłam na stronie Teachers Pay Teachers u Hord Arsalan ( TUTAJ ). Strona tytułowa: Lista niektórych wysłuchanych utworów Chopina: Rodzina Fryderyka Chopina: Z tyłu lapbooka znajduje się oś czasu z najważniejszymi datami z życia Chopina: Jak widać, jak zawsze mieszamy języki, głównie polski i angielski. Ani nie robi różnicy czy uczy się po polsku czy po angielsku, tak więc jej notatki i projekty są również dwujęzyczne.

Animals Classification Lapbook

Last week Jaś has been very busy working on the animal classification lapbook. Lately it's been very difficult to get him interested in doing any kind of project, but to my surprise he has finished this lapbook in just a few days! I am really proud of him. I used a ready lapbook template from the wonderful Homeschool Share website, but I asked Jaś to writ all the information in his own handwriting instead of just printing the prepared text. Here are the photos of his lapbook: Jaś adding the finishing touches to the lapbook cover: Lapbook cover: The inside of the lapbook: Inside 'Classifying Living Things ': Animals with and without backbones are called:  Inside 'What are the four main Invertebrate Classes?': Inside 'What are the five Vertebrate Classes?': Mollusk characteristics Annelid characteristics: Arthropod characteristics: Echinoderm characteristics: Fish characteristics: Reptile char...

Pszczółka z rolki

Coraz rzadziej piszę tu o tym co robimy w domu, a coraz częściej o naszych wycieczkach i odkrywaniu przyrody. Dzisiaj jednak pokażę Wam co takiego kilka dni temu zrobiła Ania. Kilka tygodni temu dotarła do nas w końcu książka Piotra Sochy pt. "Pszczoły". Od razu zabrałyśmy się do czytania. Jest to ślicznie wydana przez Wydawnictwo Dwie Siostry książka-album o wszystkim co związane jest w pszczołami. Lektura tej książki to dopiero początek naszego poznawania pszczół.  Oto pierwsza praca Ani związana z pszczołami: Potrzebne materiały: rolka po papierze toaletowym żółty papier czarny papier zielony papier błękitny papier lub przezroczysta kalka kwiatki - naklejki przyklejane oczy nożyczki klej czarny flamaster Przycinamy kawałek żółtego papieru i oklejamy nim rolkę: Przycinamy trzy paski czarnego papieru o przyklejamy je jako paski pszczółki: Teraz kolej na skrzydełka i czułki: Przyklejamy lub rysujemy oczy i buzię-uśmiech: ...